Tatonka Lastenkraxe carrier - radio amateurs backpack shack
I recently wrote an article in RadCom [1] describing trekking backpacks that might be useful for radio amateurs taking equipment into high places. This was based on my experience over many years hiking in the Alps carrying relatively heavy (non amateur radio) loads of ca. 25-30 kg.
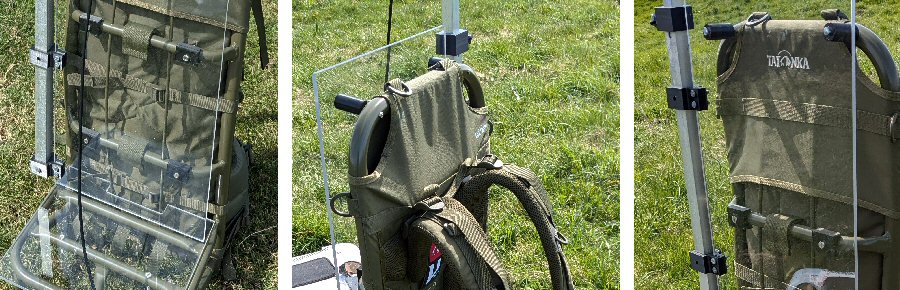
Last year I was left some money after Rufus Marsh, a good friend of mine died. Rufus was a fantastic technician, prop maker and experimenter. I wanted to use the money to buy something I probably would not have thought of purchasing without this gift. I also wanted it to be a special project that I knew he would have loved and found interesting. I brought a Tatonka Lastenkraxe carrier [3] (see photos). This is a robust and well-made carrier with proper shoulder straps and an excellent hip support system that you would find on a standard quality backpack.
Tatonka Lastenkraxe carrier 2 ca. Ł160-200
pack frame ca. 2.7 kg 78 x 35 x 28 cm, loads up to 50 kg [3]
Tatonka are a German company [3] that make quality army and civilian hiking equipment. Unlike a standard backpack, this carrier is designed to allow heavy loads (up to 50 kg) to be carried safely. Rather than having a bag that can be filled, it has an L-shaped frame made of 24 and 20 mm welded aluminium tubes, that can be loaded up.
3D printed parts and 3D printed side mast
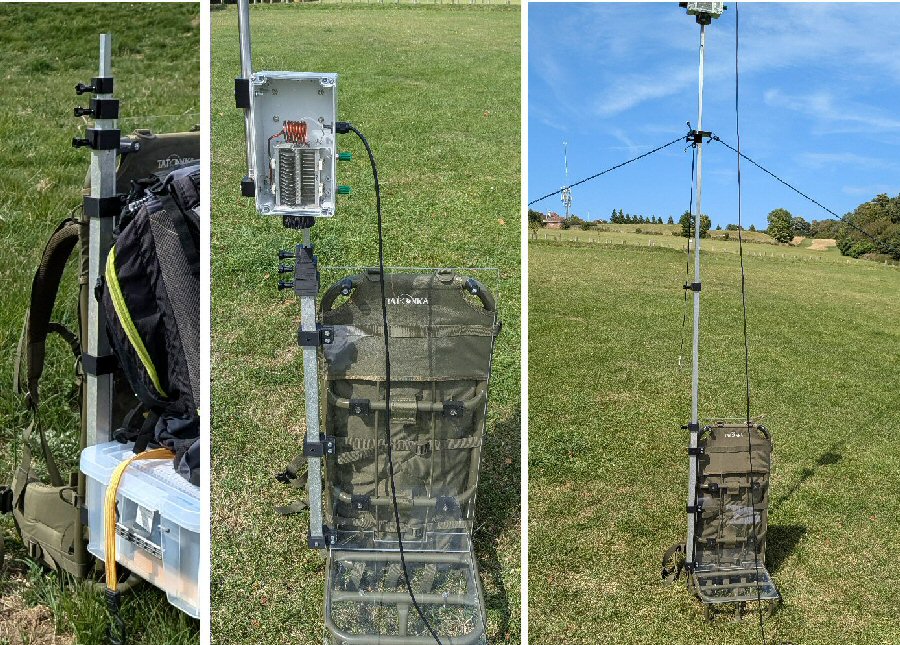
As the carrier is a sturdy device that can stand up, an antenna mast [4] can be an integral part of the design. In principle I wanted a portable solution that would allow me to sit the equipment down and operate with minimal set-up time and I wanted this simplicity to include the antenna mast. In the 23cm station I don't need any guying unless it's very windy.
I made a four-section mast out of a set of ca. 60-70 cm long concentric square cross section aluminium tubes that I happen to have. When fully extended the mast is about 2.5 m high and when fully retracted is about 70cm long and just protrudes above the top of the pack.
Tube cross sections of each of the tubes (ca. 0.6 m long):
25.5 mm (inside: 22.3 mm) = bottom section,
20 mm (inside: 17 mm),
16.2 (inside: 13 mm),
12.8 mm = top section
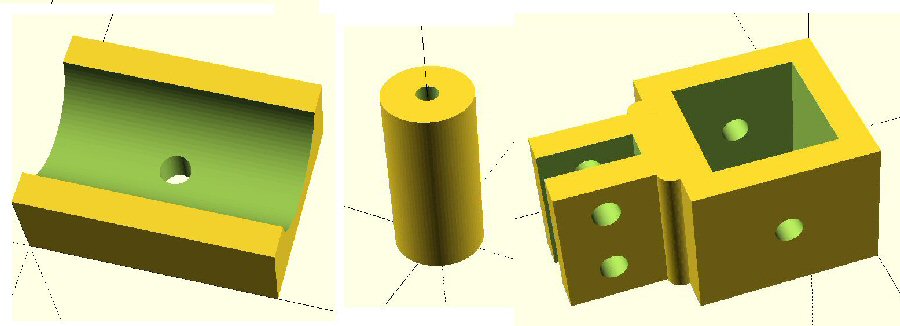
I 3D printed all the parts in PLA filament holders between each section and used butterfly bolts (go pro thumb bolts) to secure each section [4], see photos.
(if you can, use ASA as it has better UV and thermal stability)
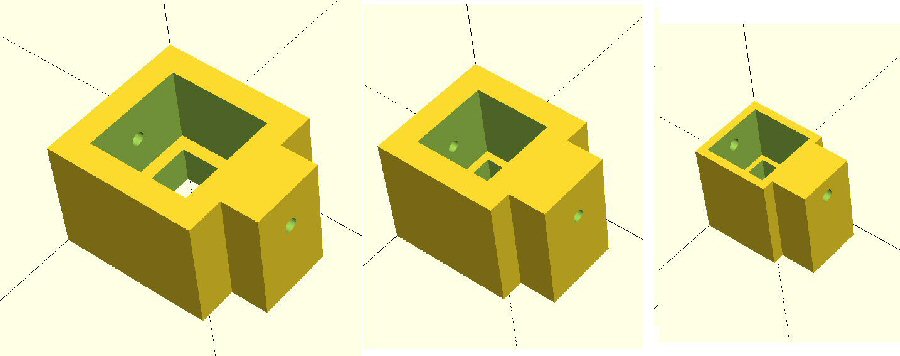
I used four of the semi circular brackets (1), two of the tubular supports (2), three of the mast to Perspex clamps (3), one circular guy rope fixing (4) and one each of the mast fixings (5-7)
Apart from the 3D printed parts I used various length M4 nuts and bolts as well as go-pro type screws to lock the moving parts etc.
|
G1EXG radio page |
1. frame mount ".stl" file ".scad" file ".g" file (prints one, need four) |
2. tubular perspex support ".stl" file ".scad" file ".g" file (prints one, need two) |
3. mast mount ".stl" file ".scad" file ".g" file (prints one, need three) |
4. guy rope holder plate ".stl" file ".scad" file ".g" file (prints one) |
back to 3D page |
|
G1EXG radio page |
5. largest section holder ".stl" file ".scad" file ".g" file (prints one) |
6. middle section holder ".stl" file ".scad" file ".g" file (prints one) |
7. smallest section holder ".stl" file ".scad" file ".g" file (prints one) |
more soon |
back to 3D page |
References and links
[1] Backpacks for Radio Mountain Goats, J P Hare, RadCom, Journal of the Radio Society of Great Britain, March 2024
[2] www.zoomscience.co.uk/rufus
[3] Tatonka web site: https://www.tatonka.com/en/
[4] CSC 3D page: https://www.creative-science.org.uk/3D.html
[5] Service history of an IC706 MK II G, J P Hare, Practical Wireless Magazine, August 2025
THE CREATIVE SCIENCE CENTRE
home | diary | whats on | CSC summary | latest news